그동안 GPU 귀찮아서 사용을 안했다. 하지만 이제 슬슬 계산하는데 시간이 너무 많이 걸려서 GPU 설치후 작동을 시작한다.
필자는 윈도우 환경에서 진행한다.
작업하기전 컴퓨터가 꺼졌다 켜질수도 있으니 중요한 작업은 잠시 저장해두길 바란다.
1. win+R 눌러서 dxdiag 입력후 2번째 탭 들어가서 GPU모델명 확인


Windows에서 그래픽 카드 정보를 찾는 방법
www.autodesk.co.kr
2. 확인 했으면, 아무데나 tf.py 파일을 만들고 아래의 코드를 실행
from tensorflow.python.client import device_lib
print(device_lib.list_local_devices())
아래와 같은 결과가 나온다.
3. 드라이버 다운로드
https://www.nvidia.com/download/index.aspx?lang=en-us
Download the latest official NVIDIA drivers
Download the latest official NVIDIA drivers
www.nvidia.com
위의 사이트에 들어가서 본인에 맞는 드라이버 버전을 선택해 다운받는다.


참고: win+R 누르고 winver 입력한다. 그럼 윈도우 버전이 출력된다.
다운받은뒤 설치하고 cmd창에서 nvidia-smi 입력하면 설치가 잘 되어있는지 확인 가능하다.
win+R 후 cmd 입력 -> 창 뜨면 nvidia-smi 입력

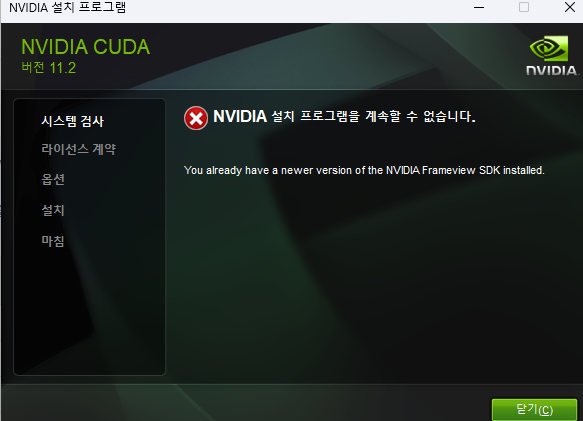
4. CUDA 툴킷 설치
https://developer.nvidia.com/cuda-toolkit-archive
CUDA Toolkit Archive
Previous releases of the CUDA Toolkit, GPU Computing SDK, documentation and developer drivers can be found using the links below. Please select the release you want from the list below, and be sure to check www.nvidia.com/drivers for more recent production
developer.nvidia.com
위의 사이트에서 개인 CUDA 버전에 맞는 툴킷을 다운받는다.

CUDA toolkit을 설치할 때 따로 경로를 설정하지 않았다면
C:/Program Files/NVIDIA GPU Computing Toolkit/CUDA/ 경로가 생성된다.
5. CUDA Deep Neural Network 다운로드
아래 사이트에서 로그인후 다운가능하다. https://developer.nvidia.com/rdp/cudnn-download
cuDNN 9.0.0 Downloads
developer.nvidia.com

다운로드후 압축을 해제한다.

위의 3개 폴더를 CUDA toolkit 폴더에 복사 붙여넣기 한다.

6. 다시 tf.py 실행후 GPU 인식되는지 확인하기
https://developer.nvidia.com/rdp/cudnn-archive
cuDNN Archive
Download releases from the GPU-accelerated primitive library for deep neural networks.
developer.nvidia.com
위에 링크 안되서 여기서 받았다 왜 용량이 다른거지
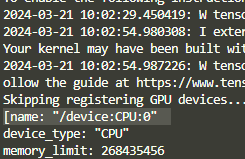
To enable the following instructions: SSE SSE2 SSE3 SSE4.1 SSE4.2 AVX2 AVX_VNNI FMA, in other operations, rebuild TensorFlow with the appropriate compiler flags.
[name: "/device:CPU:0"
device_type: "CPU"
memory_limit: 268435456
locality {
}
incarnation: 931578227493110364
xla_global_id: -1
]
화가 난다 안된다.
https://www.tensorflow.org/install/source_windows?hl=ko#tested_build_configurations
Windows의 소스에서 빌드,Windows의 소스에서 빌드 | TensorFlow
이 페이지는 Cloud Translation API를 통해 번역되었습니다. Windows의 소스에서 빌드,Windows의 소스에서 빌드 컬렉션을 사용해 정리하기 내 환경설정을 기준으로 콘텐츠를 저장하고 분류하세요. 소스에
www.tensorflow.org
확인해보다 cuda 11.2 버전 까지만 지원한다고 한다. cuDNN도 지우고 다시깔아야 하나

<현재까지의 상황>
python 3.8.0
cuda : 11.2v
cudatoolkit: 8.1
tensorflow 2.10 버전을 활용하여 가동하였더니?
(물론 vscode에서 인터프리터 설정을 통해서 conda에서 만들어둔 가상환경을 사용하면 된다.)
from tensorflow.python.client import device_lib
import tensorflow as tf
print(device_lib.list_local_devices())


print(tf.test.is_built_with_cuda())
print(tf.test.is_built_with_gpu_support())

# 위의 코드가 모두 True가 되어야지 사용이 가능하다
아나콘다 프롬프트에서 작성
(base) C:\Users\minwo> conda create -n tensor
(base) C:\Users\minwo> conda env list
(base) C:\Users\minwo> activate tensor

나중에 환경변수 경로설정을 다시 해보아야 겠다 하 진짜 왜 안되는 걸까
아나콘다로 가상환경 만들고 버전까지 다 맞추었는데 GPU 인식까지 하는데 실패하네....
'알아두면좋은IT상식' 카테고리의 다른 글
| [논문 분석] 강우자료의 비동질성 규명을 위한 변동점 분석기법의 상호비교 및 적용 (1) | 2024.01.10 |
|---|---|
| CPD(Change Point Detection, 변화 지점 탐지)란 무엇인가?~ (0) | 2023.12.24 |
| [CS] 디자인 패턴과 프로그래밍 패러다임 part 1 (2) | 2023.10.26 |
| [머신러닝/딥러닝] 자주 등장하는 용어 정리 (0) | 2023.07.20 |
| [Git&Github] 깃이란 무엇인가 그리고 깃허브는 어떻게 쓰는건가? part 2 (0) | 2023.07.07 |


